UPDATE : Blogger has now replaced the "Add Page Element" link with the "Add Gadget" link. Clicking on this link will bring up the "Add a Gadget" popup window. All the original Blogger widgets are listed under the Basics subtab in this popup window.
Blogger widgets are now called as Blogger Gadgets. The rest are Google Gadgets which have now been integrated into the Blogger Layout----->Page Elements tab.
To add widgets/gadgets to your blog ...........
Login to your Dashboard and click on Layout under your Blog name. This brings up the Page Elements page under the Template tab.
IMPORTANT : PAGE ELEMENTS ARE ONLY AVAILABLE IF YOU ARE IN BETA BLOGGER WITH A BETA TEMPLATE AND NOT ON FTP.A Page Element is the other name for a Widget in Beta Blogger. Page Element are contained within Sections. The four Sections of your Blog are : Header, RightSidebar, LeftSidebar, Main(Blog Posts) and Footer. Click on Add Page Element link in any Section of the Layout. This opens the Choose A New Page Element window. Here are listed the types of Page Elements :
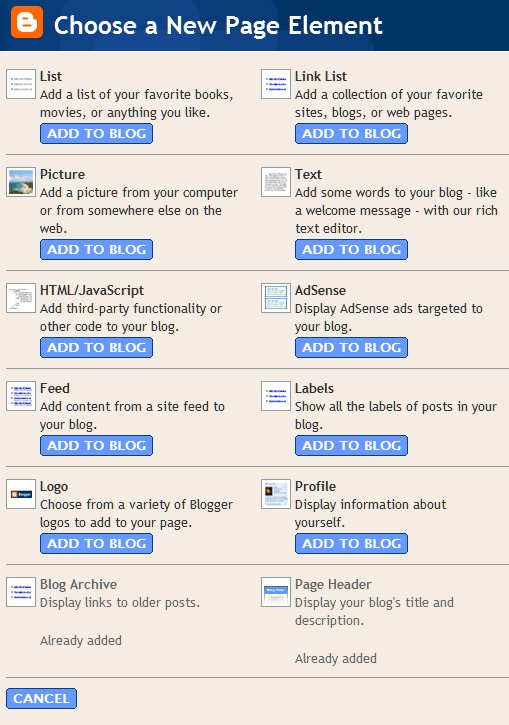
- List. Add a list of your favorite books, movies, or anything you like.
- Link List. Add a collection of your favorite sites, blogs, or web pages.
- Picture. Add a picture from your computer or from somewhere else on the web.
- Text. Add some words to your blog - like a welcome message - with our rich text editor.
- HTML/Javascript. Add third-party functionality or other code to your blog. You can add any Javascript here. Javascript need not be written for beta blogger specifically. To search for Javascripts just Google for them and then copy paste here.
- Adsense. Display AdSense ads targeted to your blog.
- Feed. Add content from a site feed to your blog.
- Labels. Show all the labels of posts in your blog.
- Logo. Choose from a variety of Blogger logos to add to your page.
- Profile. Display information about yourself.
- Blog Archive. Display links to older posts.
- Page Header. Display your blog's title and description.
Choose the type of Page Element you want and enter the data you want it to carry. Then Save Changes and View Blog.
To Edit the Page Element after adding it click on the Edit link in that section in Page Elemnts tab.
NOTE : PAGE ELEMENTS ARE REFERRED TO AS WIDGETS INTHE TEMPLATE CODE.This will open a window to give access to edit options of each Page Element. For example if you click on Edit in Blog Posts section you will see the following window :

Here you can choose whether to show your Labels below your posts and other options. In the same way you can access other Page Elements for editing. You can also rearrange Page elements from this page by drag-and-drop method. To do this click on the element you want to move hold the click, drag it to new position and drop it (release click) there. See image below :

You can also add third party Page Elements from other sites.
CONFUSED ABOUT WHICH PAGE ELEMENT TO CHOOSE? THEN SELECT THE HTML/JAVASCRIPT OPTION.So if you're on another site and enounter a button that says [+Blogger] or [Add to Your Blog] click on such a button, you should be prompted to log in to Blogger (if you aren't already logged in) and then you can select one of your blogs. You'll also see the title, content and template for the new page element, which you can edit if you want. A logo and "more info" link may also be present to tell you more about where this page element comes from, who created it, and what it does.
By clicking the [Add Page Element] button on this screen, you will be adding code to your blog. So it's important to make sure you either trust the source of this code, or have reviewed it to make sure it's something you're willing to have on your blog.
Once you've added the page element, it will appear on the Template | Page Elements tab for your blog, where you can edit, move, or delete it, just like the other parts of your page.
Read more: http://www.blogdoctor.me/2006/10/how-to-add-widgets-to-your-blog.html#ixzz1xvvVht5m
Thanks a lot for this useful tips you posted in here. I am just hoping that there will be no problem that will arose if I use my widget and you can just Click Here To Buy Blue Widgets if you like to know more about it.
ReplyDelete